 |
 |
 |
 |
 |
 |
 |
 |
 |
 |
 |
 |
 |
 |
 |
 |
 |
 |
 |
 |
 |
 |
 |
 |
 |
 |
 |
 |
 |
 |
 |
 |
 |
 |
 |
 |
 |
 |
 |
 |
 |
 |
 |
 |
 |
 |
 |
 |
 |
 |
 |
 |
 |
 |
 |
 |
 |
 |
 |
 |
 |
 |
 |
 |
 |
 |
 |
 |
 |
 |
 |
 |
 |
 |
 |
 |
 |
 |
 |
 |
 |
 |
 |
 |
 |
 |
 |
 |
 |
 |
 |
 |
 |
 |
 |
 |
 |
 |
|
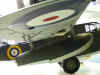
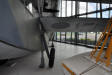
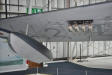
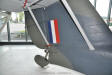
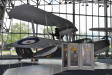
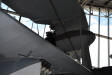
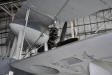
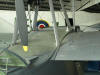
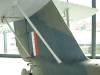
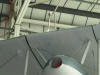
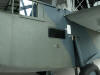
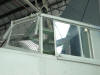
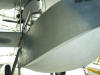
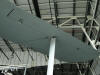
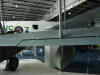
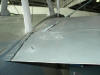
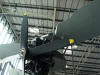
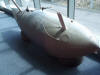
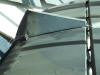
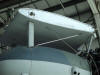
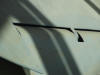
| Below: what a difference a couple of years makes! In the ensuing period
since I shot the walk-round above, the museum authorities have
removed the old solid end wall of the Battle of Britain Hall and
replaced it with a totally glass one, and then moved the Walrus
into the BoB hall from the main building where it always had been.
By pure luck they have placed it next to the end window, behind
the short Sunderland and the results can be seen here. For the
most part it is now in broad daylight and the difference is plain
to see. So, in a recent visit I made the most of it with the 58
images you see here! |
| g |
|
 |
 |
 |
 |
 |
 |
 |
 |
 |
 |
 |
 |
 |
 |
 |
 |
 |
 |
 |
 |
 |
 |
 |
 |
 |
 |
 |
 |
 |
 |
 |
 |
 |
 |
 |
 |
 |
 |
 |
 |
 |
 |
 |
 |
 |
 |
 |
 |
 |
 |
 |
 |
 |
 |
 |
 |
 |
 |
|
| g |
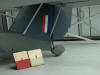
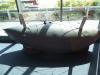
| Prolific
SEAWINGS correspondent
Igor Kolokolov
also visited the RAF Museum and very kindly granted permission for
his walk-round images to be added to this Gallery. Once again - as
ever - my grateful thanks goes to Igor for a smashing series of
first-class images. |
| g |
|
-WR-%20ex%20Igor%20Kolokolov/01_small.jpg) |
-WR-%20ex%20Igor%20Kolokolov/02_small.jpg) |
-WR-%20ex%20Igor%20Kolokolov/03_small1.jpg) |
-WR-%20ex%20Igor%20Kolokolov/04_small1.jpg) |
-WR-%20ex%20Igor%20Kolokolov/05_small1.jpg) |
-WR-%20ex%20Igor%20Kolokolov/06_small1.jpg) |
-WR-%20ex%20Igor%20Kolokolov/07_small1.jpg) |
-WR-%20ex%20Igor%20Kolokolov/08_small1.jpg) |
-WR-%20ex%20Igor%20Kolokolov/09_small1.jpg) |
-WR-%20ex%20Igor%20Kolokolov/10_small1.jpg) |
-WR-%20ex%20Igor%20Kolokolov/11_small1.jpg) |
-WR-%20ex%20Igor%20Kolokolov/12_small1.jpg) |
-WR-%20ex%20Igor%20Kolokolov/13_small1.jpg) |
-WR-%20ex%20Igor%20Kolokolov/14_small1.jpg) |
-WR-%20ex%20Igor%20Kolokolov/15_small1.jpg) |
-WR-%20ex%20Igor%20Kolokolov/16_small1.jpg) |
-WR-%20ex%20Igor%20Kolokolov/17_small1.jpg) |
-WR-%20ex%20Igor%20Kolokolov/18_small1.jpg) |
-WR-%20ex%20Igor%20Kolokolov/19_small1.jpg) |
-WR-%20ex%20Igor%20Kolokolov/20_small1.jpg) |
-WR-%20ex%20Igor%20Kolokolov/21_small1.jpg) |
-WR-%20ex%20Igor%20Kolokolov/22_small1.jpg) |
-WR-%20ex%20Igor%20Kolokolov/23_small1.jpg) |
-WR-%20ex%20Igor%20Kolokolov/24_small1.jpg) |
-WR-%20ex%20Igor%20Kolokolov/25_small.jpg) |
-WR-%20ex%20Igor%20Kolokolov/26_small.jpg) |
-WR-%20ex%20Igor%20Kolokolov/27_small.jpg) |
-WR-%20ex%20Igor%20Kolokolov/28_small.jpg) |
|
-WR-%20ex%20Igor%20Kolokolov/30_small.jpg) |
-WR-%20ex%20Igor%20Kolokolov/31_small.jpg) |
-WR-%20ex%20Igor%20Kolokolov/32_small.jpg) |
-WR-%20ex%20Igor%20Kolokolov/33_small.jpg) |
-WR-%20ex%20Igor%20Kolokolov/34_small.jpg) |
-WR-%20ex%20Igor%20Kolokolov/35_small.jpg) |
-WR-%20ex%20Igor%20Kolokolov/36_small.jpg) |
-WR-%20ex%20Igor%20Kolokolov/37_small.jpg) |
-WR-%20ex%20Igor%20Kolokolov/38_small.jpg) |
-WR-%20ex%20Igor%20Kolokolov/39_small.jpg) |
-WR-%20ex%20Igor%20Kolokolov/40_small.jpg) |
-WR-%20ex%20Igor%20Kolokolov/41_small.jpg) |
-WR-%20ex%20Igor%20Kolokolov/42_small.jpg) |
|
| g |
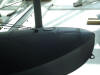
| There
will always be room for another highly-detailed
photographic walk-round featuring a flying boat that has
already been covered, even by myself, on this site. Why?
well, multiple digital cameras record details
differently, lighting can be completely different
between photographers and camera angles can be
different, one photographer managing to pull off a
detail shot that another couldn't; there are many
reasons over time.
So, when
one is fortunate enough to be offered high-quality image
material from an semi-professional aircraft and WR
aficionado such as Hungarian correspondent
Gyula
Zoltan,
then I will certainly make room..! Gyula runs the
Hunavia
and
Superfighter
websites; Have a look at the rest of his superb work
here. Many thanks, Gyula. |
| g |
|
 |
 |
 |
 |
 |
 |
 |
 |
 |
 |
 |
 |
 |
 |
 |
 |
 |
 |
 |
 |
 |
 |
 |
 |
 |
 |
 |
 |
 |
 |
 |
 |
 |
 |
 |
 |
 |
 |
 |
 |
 |
 |
 |
 |
 |
 |
 |
|
| g |
|
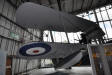
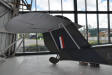
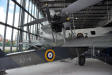
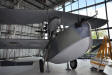
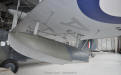
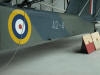
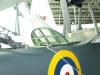
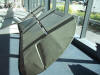
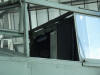
I make no apologies for adding yet another photographic
walk-round of the Walrus, especially when it is as good
as this one; by combining all the SEAWINGS Walrus WR's
together, at least the enthusiast will have the very
best chance of complete coverage!
The
essence of a worthwhile photo-reference walk-round is
that the images must be large, clear, sharp, well lit
and above all, in-focus. This superb WR by new
correspondent
Phil
Brenton
of the Supermarine Walrus/Seagull V on display at the
RAF
Museum, Hendon, London
is precisely what I'm talking about. It is as near
perfect as one can get and I thank Phil profusely for
allowing SEAWINGS to host it here. Thanks, Phil. |
|
| g |
|
 |
 |
 |
 |
 |
 |
 |
 |
 |
 |
 |
 |
 |
 |
 |
 |
 |
 |
 |
 |
 |
 |
 |
 |
 |
 |
 |
 |
 |
 |
 |
 |
 |
 |
 |
 |
 |
 |
 |
 |
 |
 |
 |
 |
 |
 |
 |
 |
 |
 |
 |
 |
 |
 |
 |
 |
 |
 |
 |
 |
 |
 |
 |
 |
 |
 |
 |
 |
 |
 |
 |
 |
 |
 |
 |
 |
 |
 |
 |
 |
 |
|
| g |
|
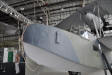
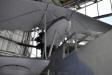
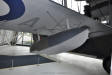
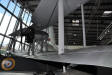
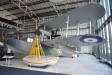
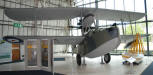
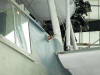
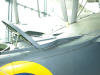
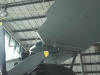
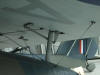
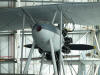
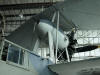
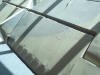
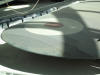
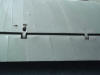
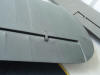
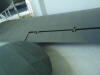
2016: Imagine my surprise when making a 'routine' visit
to the RAF Museum on a weekend in July and wandering
around the familiar exhibits for a while, I stumbled
upon the Walrus - and other exhibits within the Battle
of Britain Museum Hall - being 'stripped down' - taken
apart into manageable sections - as it was explained to
me that they are all being relocated into the main
building as the BoB hall is being turned into some sort
of 'Visitor and Event Centre'.
Wow, I
thought, until I realised that this was the opportunity
to obtain close-up photos of the Walrus from angles that
one might never see again and so I set about her with my
digital camera and these are the results. These are
slightly too bright as all the removed items were
positioned against the 'window wall' and it was a very
sunny day in London but upon reflection it has served to
highlight the details. Enjoy! |
|
| g |
|
 |
 |
 |
 |
 |
 |
 |
 |
 |
 |
 |
 |
 |
 |
 |
 |
 |
 |
 |
 |
 |
 |
 |
 |
 |
 |
 |
 |
 |
 |
 |
 |
 |
 |
 |
 |
 |
 |
 |
 |
 |
 |
 |
|
| g |
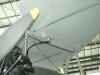
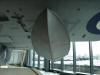
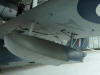
|
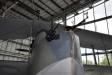
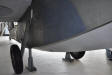
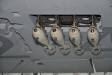
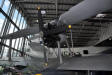
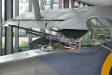
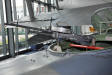
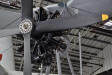
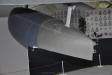
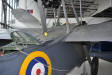
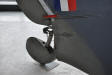
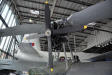
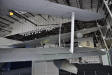
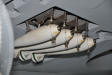
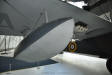
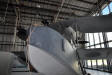
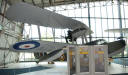
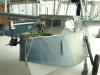
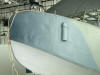
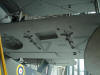
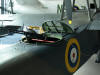
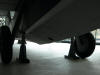
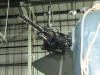
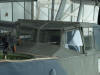
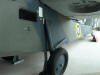
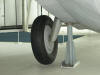
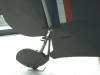
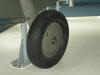
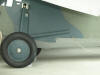
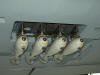
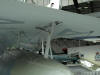
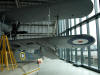
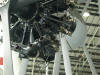
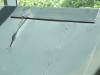
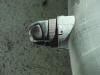
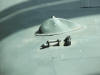
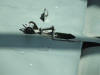
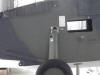
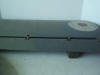
These four
images have very kindly been supplied by
Ken Withey
and show particularly well the underwing wheel well and
bomb racks. Thanks, Ken. |
|
| g |
|
 |
 |
 |
 |
|


-WR-%20ex%20Igor%20Kolokolov/01.jpg)
-WR-%20ex%20Igor%20Kolokolov/02.jpg)
-WR-%20ex%20Igor%20Kolokolov/03.jpg)
-WR-%20ex%20Igor%20Kolokolov/04.jpg)
-WR-%20ex%20Igor%20Kolokolov/05.jpg)
-WR-%20ex%20Igor%20Kolokolov/06.jpg)
-WR-%20ex%20Igor%20Kolokolov/07.jpg)
-WR-%20ex%20Igor%20Kolokolov/08.jpg)
-WR-%20ex%20Igor%20Kolokolov/09.jpg)
-WR-%20ex%20Igor%20Kolokolov/10.jpg)
-WR-%20ex%20Igor%20Kolokolov/11.jpg)
-WR-%20ex%20Igor%20Kolokolov/12.jpg)
-WR-%20ex%20Igor%20Kolokolov/13.jpg)
-WR-%20ex%20Igor%20Kolokolov/14.jpg)
-WR-%20ex%20Igor%20Kolokolov/15.jpg)
-WR-%20ex%20Igor%20Kolokolov/16.jpg)
-WR-%20ex%20Igor%20Kolokolov/17.jpg)
-WR-%20ex%20Igor%20Kolokolov/18.jpg)
-WR-%20ex%20Igor%20Kolokolov/19.jpg)
-WR-%20ex%20Igor%20Kolokolov/20.jpg)
-WR-%20ex%20Igor%20Kolokolov/21.jpg)
-WR-%20ex%20Igor%20Kolokolov/22.jpg)
-WR-%20ex%20Igor%20Kolokolov/23.jpg)
-WR-%20ex%20Igor%20Kolokolov/24.jpg)
-WR-%20ex%20Igor%20Kolokolov/25.jpg)
-WR-%20ex%20Igor%20Kolokolov/26.jpg)
-WR-%20ex%20Igor%20Kolokolov/27.jpg)
-WR-%20ex%20Igor%20Kolokolov/28.jpg)
-WR-%20ex%20Igor%20Kolokolov/30.jpg)
-WR-%20ex%20Igor%20Kolokolov/31.jpg)
-WR-%20ex%20Igor%20Kolokolov/32.jpg)
-WR-%20ex%20Igor%20Kolokolov/33.jpg)
-WR-%20ex%20Igor%20Kolokolov/34.jpg)
-WR-%20ex%20Igor%20Kolokolov/35.jpg)
-WR-%20ex%20Igor%20Kolokolov/36.jpg)
-WR-%20ex%20Igor%20Kolokolov/37.jpg)
-WR-%20ex%20Igor%20Kolokolov/38.jpg)
-WR-%20ex%20Igor%20Kolokolov/39.jpg)
-WR-%20ex%20Igor%20Kolokolov/40.jpg)
-WR-%20ex%20Igor%20Kolokolov/41.jpg)
-WR-%20ex%20Igor%20Kolokolov/42.jpg)


