Guest article by Eric Gallaud - click here to go to his web site - it's well worth it, for First World War scale modeling. |
|
Guest article by Eric Gallaud - click here to go to his web site - it's well worth it, for First World War scale modeling. |
HISTORY
CHARACTERISTICS
|
THE BOX

THE KIT
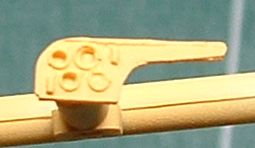
| I will
use the resin kit from Choroszy Modelbud in 1/72. The resin is well
cast, with few bubbles. I don't know yet if I will use the interplane
struts provided with removing the simulation of fabric straps, or
scratchbuild them from bamboo. I will also replace the control horns
with photoetched ones, I will scratch from brass rod the various
supports, under tailplane, under lower wings and those which maintain
the under wing floats.
First of all, let's have a look at the kit:
|
THE DECALS

KIT ASSEMBLY
|
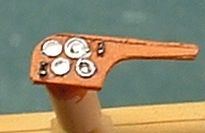
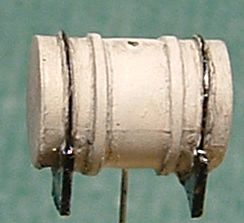
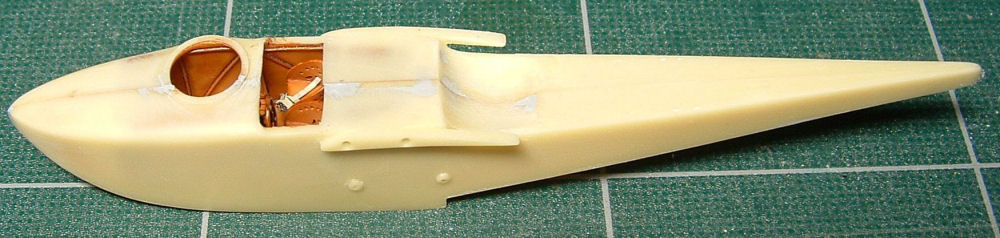
Following the remarks from Michael Kendix who also built this kit, I sanded down the seats in order to reduce their thickness to be able to close the fuselage. I drilled several holes 0.5mm diameter following the pictures I found on the SEAWINGS web site. Then, I sprayed a coat of Humbrol 63 Matt Sand on the inside of the fuselage, the floor, the seats and the instrument panel. I handbrushed a coat of Citadel Chesnut ink, which allowed to enhance all of the relief. Be careful, as this ink drys fast, you must paint it in one shot. After that, I paint some other details. I painted the tank grey, its support and fixation in Tamiya Satin Black X18 and then add a wash with gouache. This type of paint is very convinient, once painted and dry, you can remove the excess with a damp cloth or Q-tip.
After, to add the harness on the seats, I glue them in place as well as the tank and the control column. I also add a rudder bar because the one provided moulded on the floor was broken. To build it, I copied the one I saw on the Macchi M.7 on the SEAWINGS site. I add everything in the fuselage, it is ready to be closed.
Now, I can close the fuselage. First, I adjust both sides together and maintain them with clamps. I added some superglue along the joint between both sides.
|
THE FUSELAGE/HULL
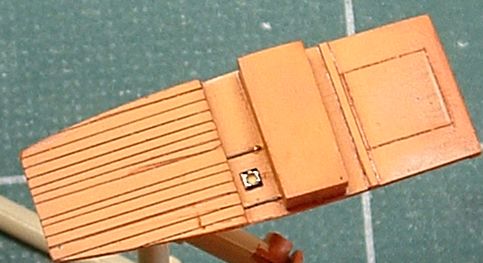
| I start
to paint the fuselage overall in white with a can of Skull
White from Citadel. Then, I mask the underside, the sides and the
tail which will receive the Italian Tricolour.
After that first painting operation, I airbrush a coat of Humbrol 63 Matt Sand onto the whole area which will be painted in wood colour. After at least 24 hours, I start the oil painting process.
I thin some Sienna Burnt Earth oil paint with turpentine (about 50%) and, with a wide flat hard brush, I apply the paint on the whole fuselage. At this stage, it is not a problem to have some brush marks everywhere. Then, first smoothing, wiith the same brush wiped on a paper towel, I smooth the paint always in the same direction (the wood grain direction) and along the whole length of the fuselage (no stopping from the front to the rear).
Once done, I start again this operation with a soft brush (same type) with no paint addition. You also have to wipe your brush to remove the excess paint. Stop the smoothing operation when the result pleases you.
After that, I wait for at least 48 hours prior to touching it to remove the masking tape.
|
BUILDING THE WINGS
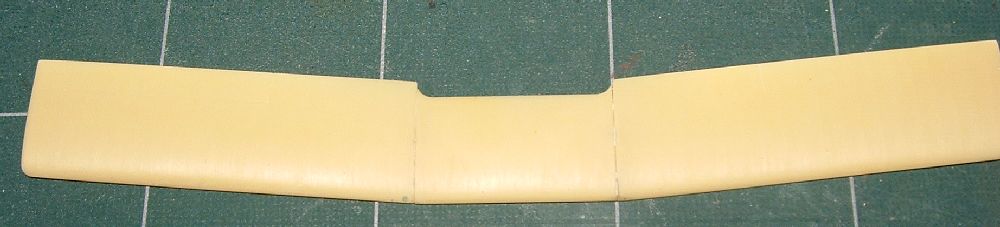
I begin
with the glueing operation. For the upper wings, I improve the joint
strength with some brass rod between each part. The lower wings are
glued without anymore reinforcement as they already have some locating
points.
I fill the glue joint between the lower wings and the fuselage with putty, but not those of the upper wings. That joint must remain visible. As I want to represent the wing ribs 'show-through' effect from under the wing, I had the not-so-good idea to use a fine marker pen, usually used to write on cd's. The problem was that after 10 coats of paint, it was like I had never painted the ribs!
After spraying a coat of Citadel Skull White, I started again to draw my wing ribs but this time with a watercolour pencil. The result is lighter and fades away with a few coats of paint over it. In addition, I draw a part of a circle to simulate the cockade showing through from the underside.
I used the paper of the decals as a template. Then, a few coats of Misterkit Clear Doped Linen - Dark, some Flag Green on starboard and some Flag Red on port, et voila..!
|
UPPER WINGS AND ENGINE SUPPORT
To
weather the top of the wings I masked the wing ribs with 0.7mm masking
tape. Then, I use pastel chalk and apply it with a brush following
each rib. I rub it in with my finger following the tape direction to
fix it then I remove the masking tape.
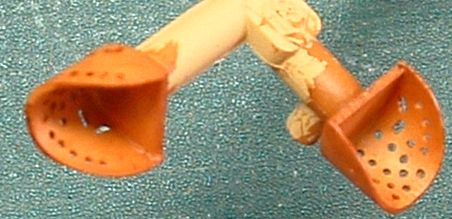
For the engine support, first I sprayed a coat of Alclad White Aluminium. Once dry (after 15mins) I brush its central part in Humbrol Black 33. After about 30 minutes, I slightly rub this paint with my finger to show through the aluminium colour.
I paint the bottom of the engine support in Humbrol 165 Medium Sea Grey. At the last, the wood colour, one coat of Humbrol 63 Matt Sand followed, when dry, buy a coat of Citadel Chesnut ink.
The engine support was washed with highly diluted Black and Burnt Sienna Earth oil paint for the inside and some trace of the same mix for the outside. The engine is painted in Alclad White Aluminium, then the cylinders in Humbrol Matt Black. After that, to have a more shiny appearance, I apply a coat of Klir.
The exhaust pipe is painted in Matt Black, then it received a dry-brush of Humbrol 113 Matt Rust. The engine crankcase is washed with highly diluted Black and Burnt Sienna Earth oil paint. The engine support is glued in place and some rigging is added prior to fitting the engine. I had to scratchbuild the crank as I didn't find it in the parts. As I opened and closed the box several times prior to starting the building process, it is possible that I lost it.
|
WING FLOATS
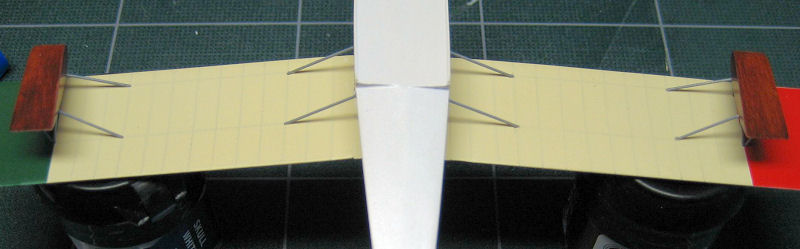
I used 0.5mm brass rod to build all of the struts. I didn't want to use the ones provided with the kit, as they were looking too fragile. They are painted in Humbrol 165 Medium Sea Grey. The struts of the tail are also made brass rod, this time 0.4mm.
UPPER WING ADDITION
After I
added the engine, I also added the cabane struts. Because of their 'N'
shape, I used the resin kit parts as provided in the kit. Their
extremities were reinforced with 0.3mm steel wire.
Then I added the upper wing onto the cabane struts. This operation is easier because of the steel wires previously inserted into the struts. After that, I added the interplane struts made from Contrail stock.
I painted the struts first with a coat of Humbrol 63 Matt Sand, then a coat of Citadel Chesnut ink. After that, I added the linen bands around them.
|
RIGGING AND PAINTING THE UPPER WING
First, I
pass the wire through the upper wing as afr as the corresponding hole -
half drilled - in the lower wing where I glue it with thick CA glue. I
repear this operation for all of the wires. I use 0.06mm fishing line,
tinted with a permanent marker.
Then each wire is tightened and glued with a drop a drop of thin CA. Once dry, I cut the excess wire with a razor blade and fill the gap with putty.
|
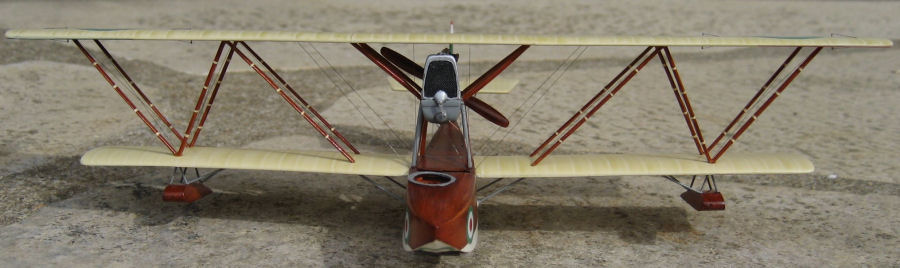
SOME IMAGES OF THE COMPLETED MODEL :
Eric's superb model won this award at the MaugeExpo at Cholet, France in October 2006:-

Well done, Eric...!!! And thank you for sharing it with SEAWINGS